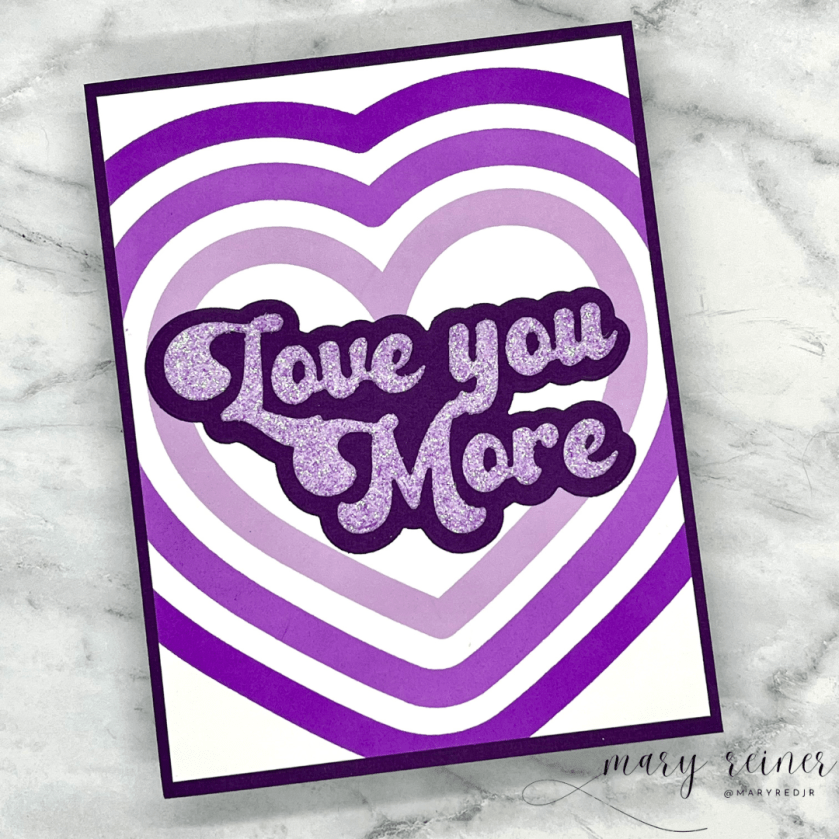
Simon Says Stamp’s latest “To Be Loved” release is packed with heartfelt products, and I am thrilled to share a card featuring the Groovy Love You die set.
This bold and retro -inspired die truly steals the show! To create my card, I used the Concentric Hearts stamp set and stamped each heart in a different shade of Simon Says Stamp Pawsitively Saturated Ink (Amethyst, Orchid and Lilac). Then, I die cut the sentiment out of Simon Says Stamp purple glitter card stock and then cut the shadow out of dark purple card stock and adhered them together. I glued the purple heart panel to a dark purple panel and then adhered the sentement. To complete my card, I adhered it to a top folding, A2 card base. A quick card that packs a punch!
Stay tuned for more projects from this amazing release and don’t forget to check out all of the new products. Click my link below to fill your cart:
Welcome to day one of STAMPtember, a month-long celebration dedicated to stamping, crafting, and card making. This annual event joins crafters from all over the world to explore new techniques, share inspiring projects and, of course, indulge in all things stamping. We are celebrating 15 years!
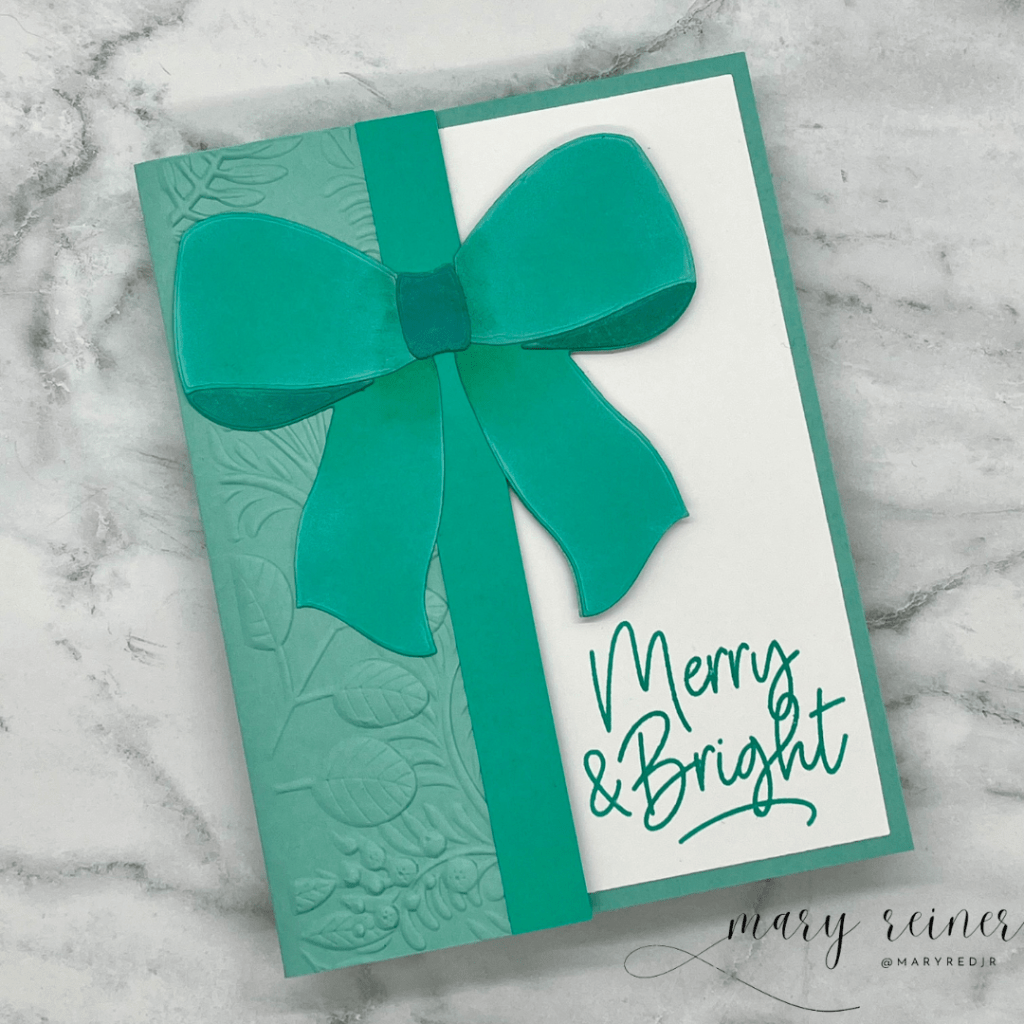
I am excited to join in the festivities again this year! Today, I am showcasing a card featuring two fabulous new products from Simon Says Stamp: the Big Bow die and Big Holiday Words stamp set. These products are perfect for adding a bold and festive touch to your holiday cards.
I used a teal color palette to create a modern and refreshing split-front, holiday card. The Big Bow die is the star, and I love how it pops against the white background. I ink blended the bow to give it a velvet-like appearance. I love how it turned out. This bow die can be used for various occasions beyond the holidays. And it is easy to assemble.
For the sentiment, I used the Big Holiday Words stamp set. This stamp set includes many bold script greetings with simple sub-sentiments. The “Merry and Bright” sentiment fits perfectly with the bow and adds a cheerful message. I stamped it in Simon Says Stamp Pawsitively Saturated Ink in Ocean to tie the whole design together.
To add texture, I embossed the front panel with the Vine Canopy embossing folder. This subtle detail enhances the overall design without overpowering the main elements.
This card was fun to create and I can’t wait to see what everyone makes with these amazing new products. Whether you are creating holiday cards, gift tags, or scrapbook pages, the Big Bow die and the Big Holiday Words stamp set will make great addition to your craft room.
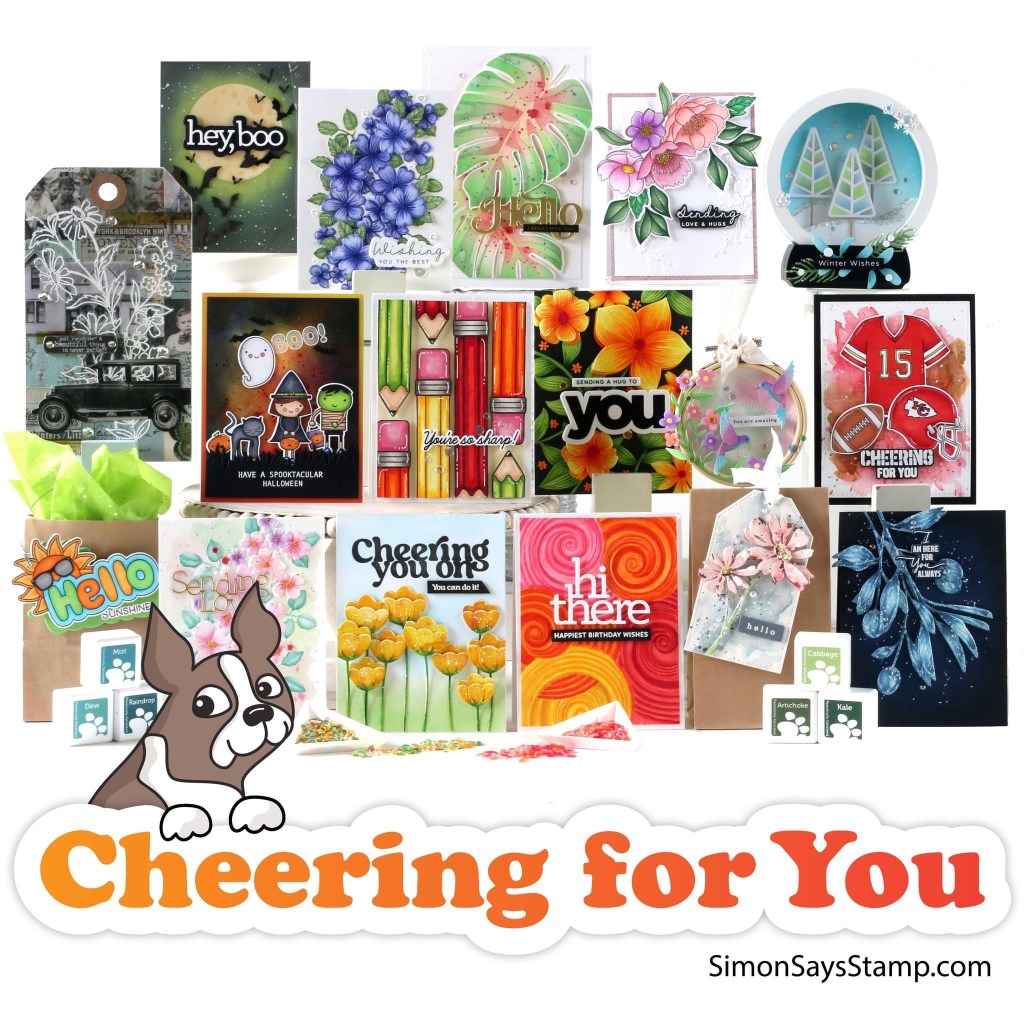
Welcome back! In a world that could always use a little more positivity, we are thrilled to introduce our latest release: Cheering for You. Join us as we unveil products designed to inspire and uplift. I will be sharing a couple of products from this new release from Simon Says Stamp.
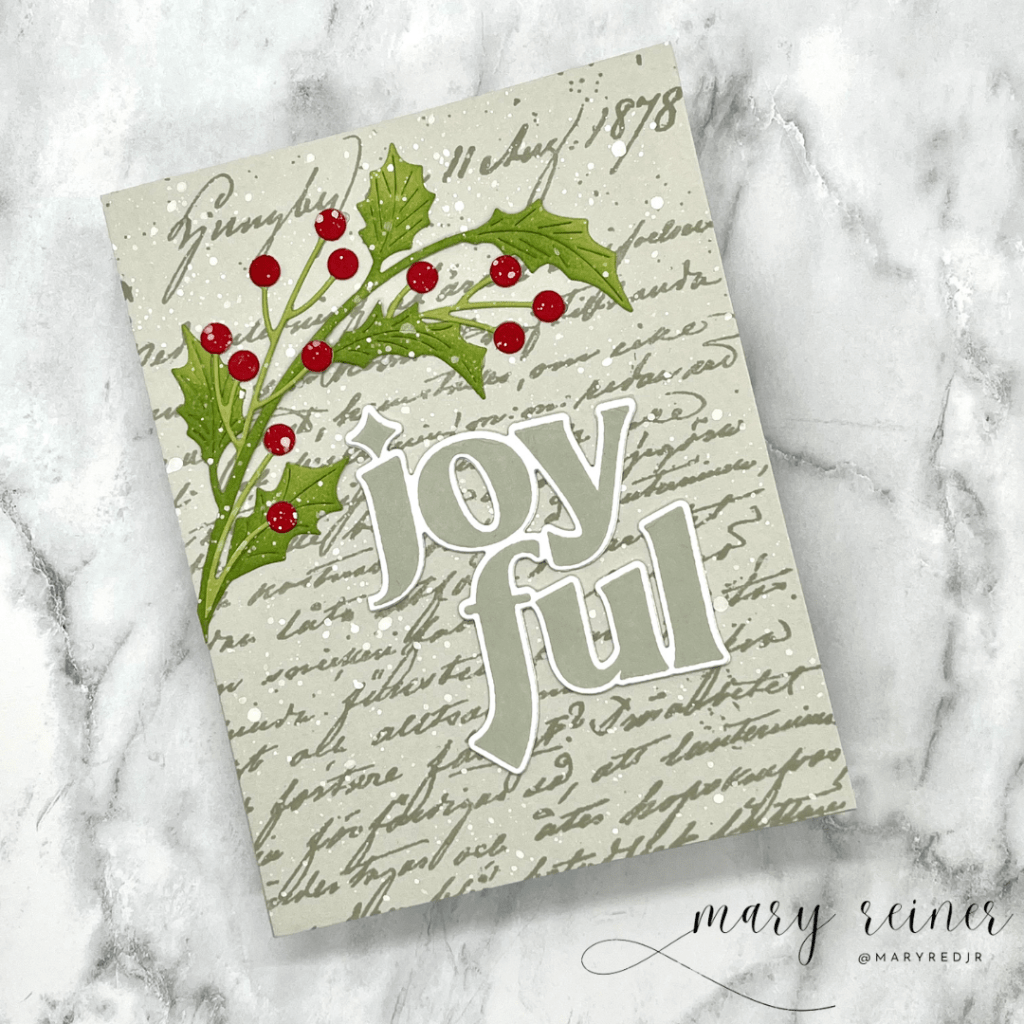
How pretty is this background? It was created using the newly released Old Letter cling stamp and white pigment ink. I have a feeling I will be using this a bunch for backgrounds. I love the subtle writing!
And I couldn’t help myself…I had to create a holiday card, too. This time I stamped it in Cozy ink onto Fog card stock. I absolutely love how this one turned out.
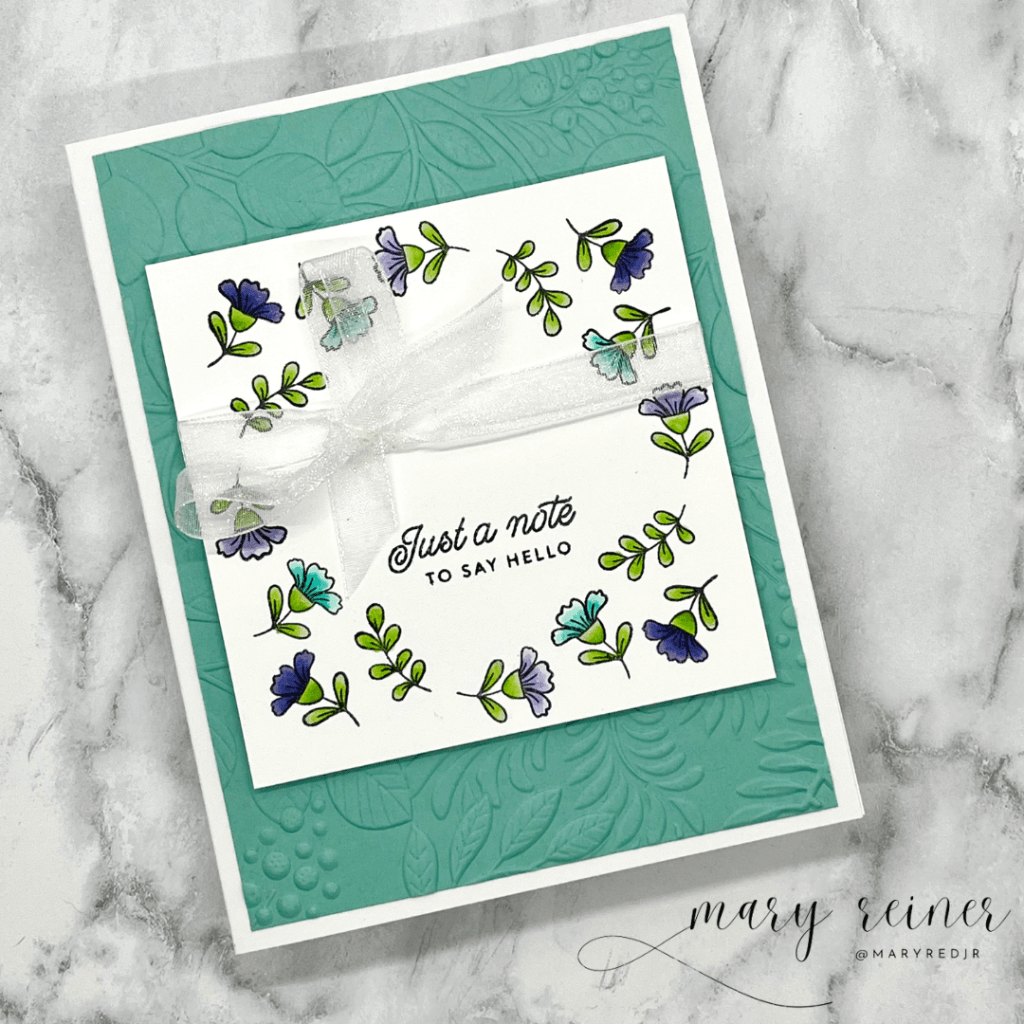
I was also sent a set of acetate cards. I really like them! High quality and already folded and ready to go. These would be a fun addition to your card stock stash.
I will admit, these are hard to photograph! But in real life, this looks really pretty. I added another oval die cut to the back of the card for write my message on. I think the recirient will think this is a unique card.
All of the products used to create my cards are from SImon Says Stamp:
You know it’s going to be a good day when Simon Says has a new release. And you will not be dissapointed!
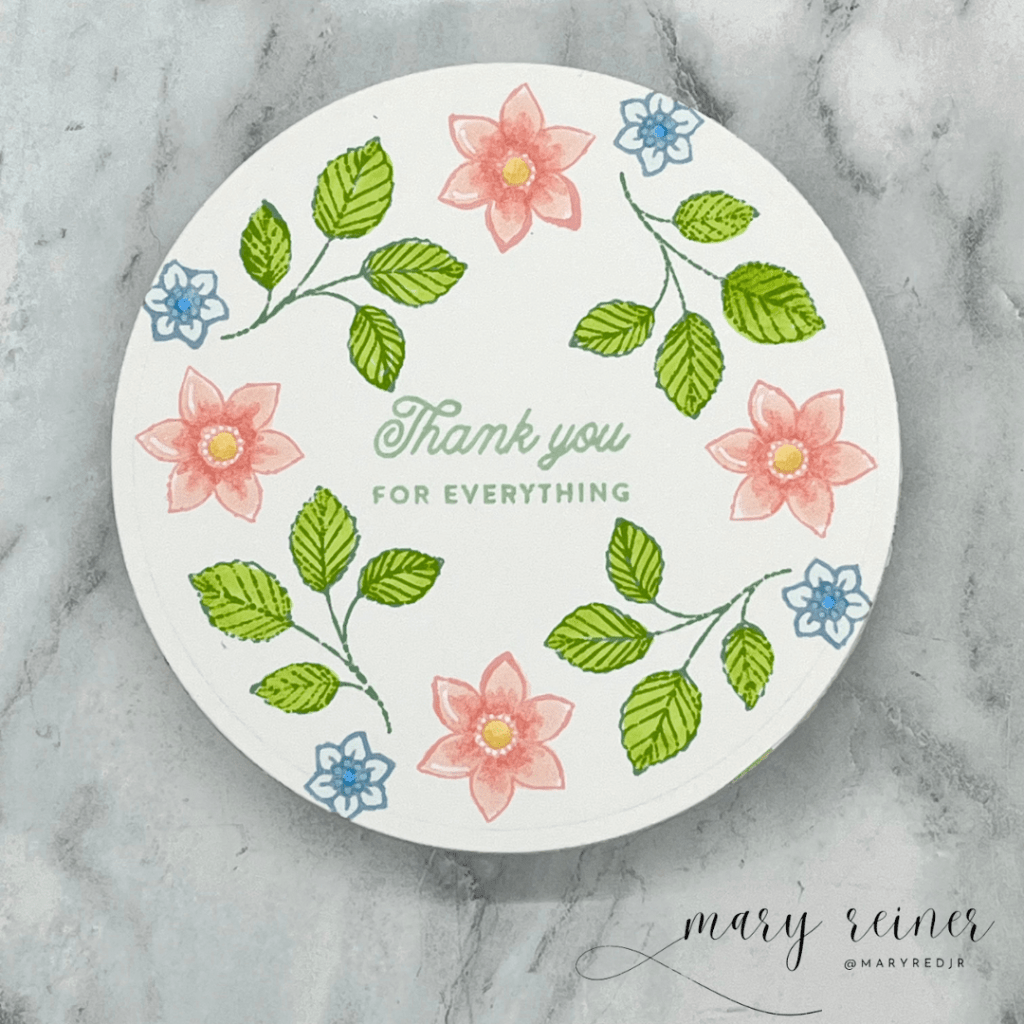
I got to play with the Beautiful Blooms stamp set. And I sure did have fun! Today, I am sharing several cards I created with this adorable set. This versatile stamp set features an array of blossoms, leaves and sprigs, allowing you to create beautiful floral arrangements tailored to your artistic vision.
I love the sweet sentiments and flowers. For this card, I simply stamped the images randomly and added the sentiment.
This stamp set also includes larger flowers that are really fun to color. And if you want to simplify the coloring, there are coordinating stencils availble too! I added Ranger Glossy Accents to the flower centers.
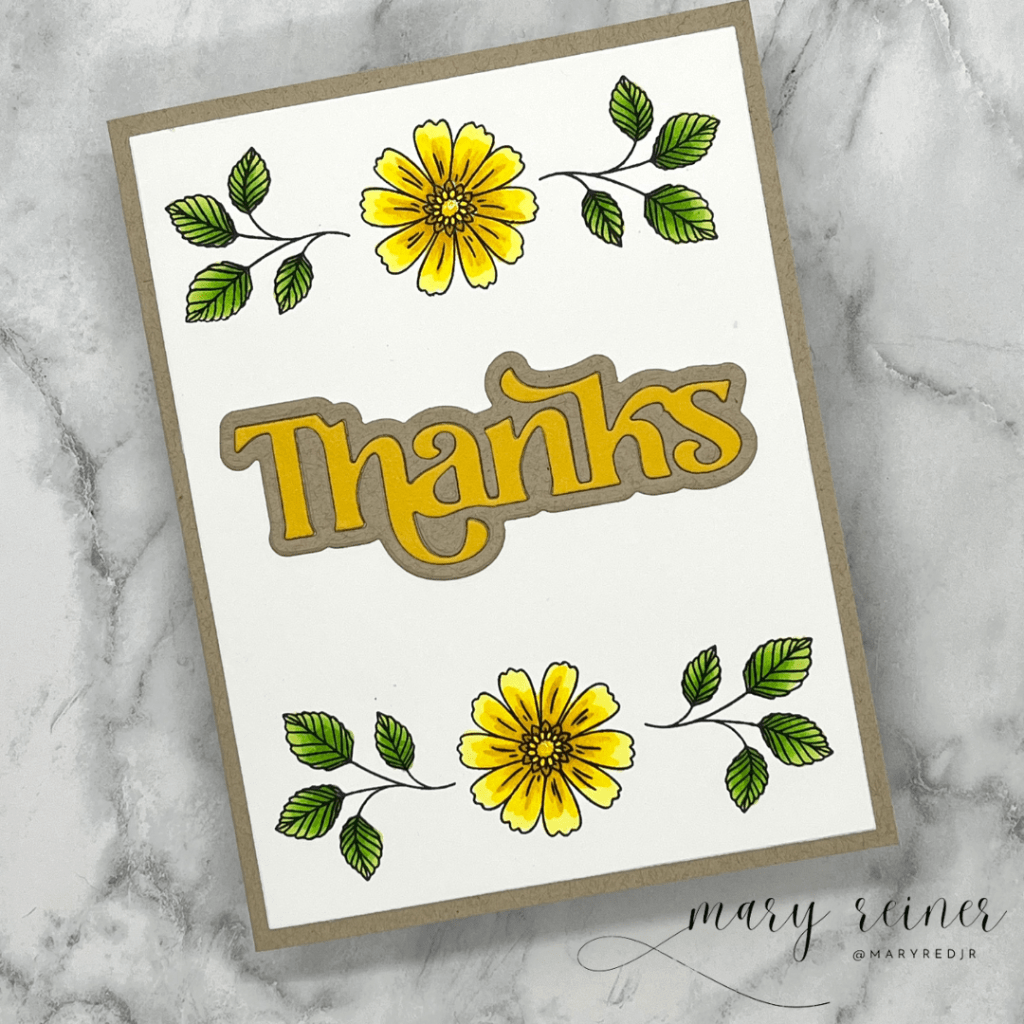
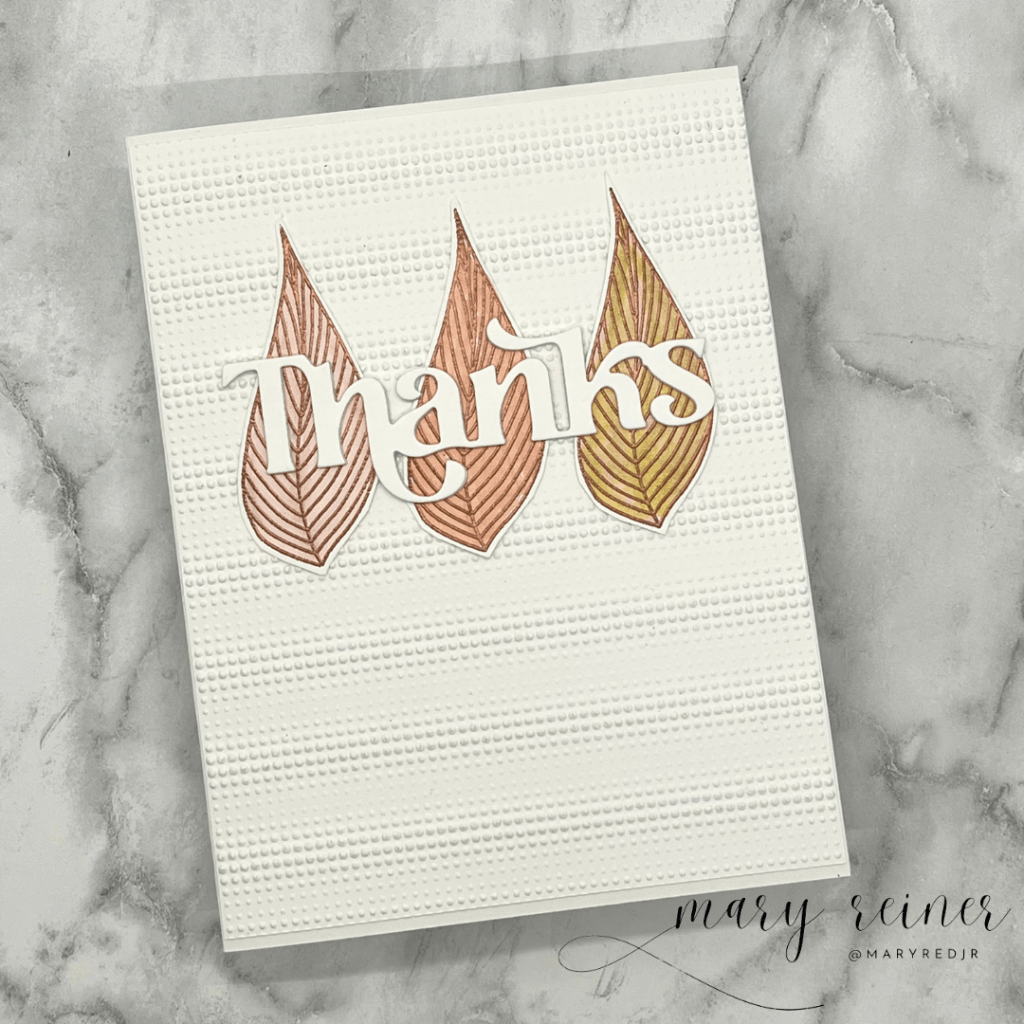
This card has a completely different feel than the other cards I created. I guess that just shows how versatile this little stamp set really is! This card is giving off Fall vibes. The sentiment is Simon Says Stamp’s Thanks wafer die set.
This card is a rocker card. (You’ll have to check out my Instagram for the reel I created for this card) Again, I used the wreath builder to create the circular pattern. This time, I stamped the images in Simon Says Stamp Pawsitively Saturated Cheeky, Morning and Aspen inks and colored with Copic Markers. I really like the softness this created.
I have provided a link for you to check out the whole release and to get shopping! I appreciate your support:
It is time once again for another awesome release from Simon Says Stamp. The Be Bold release has lots of fun products to inspire your creativity. Here is a link to the whole release: https://tinyurl.com/v7zch938
Card #1:
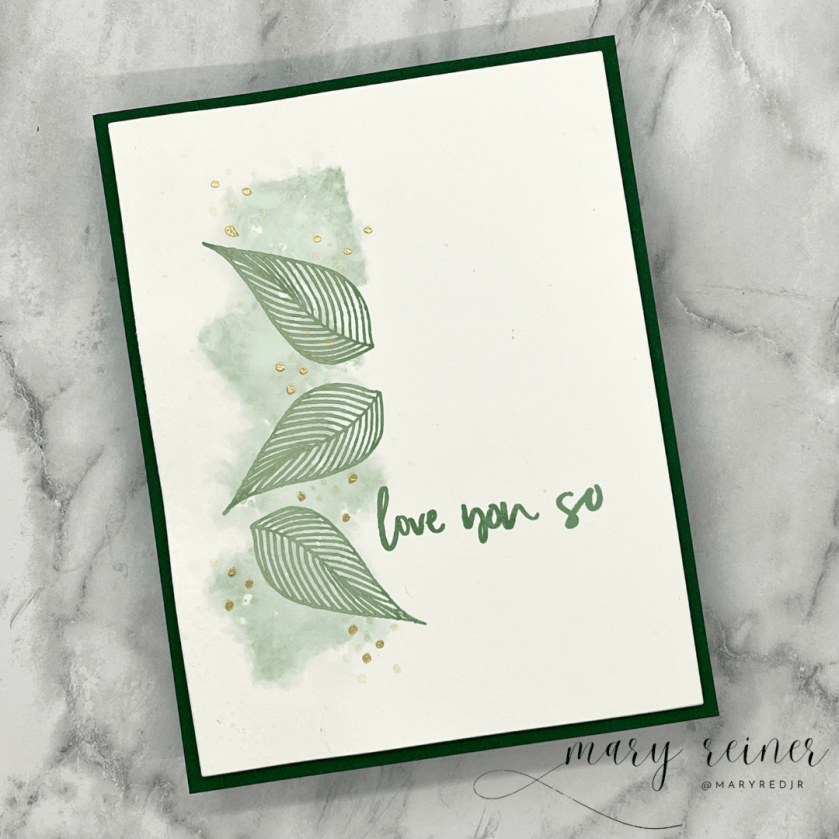
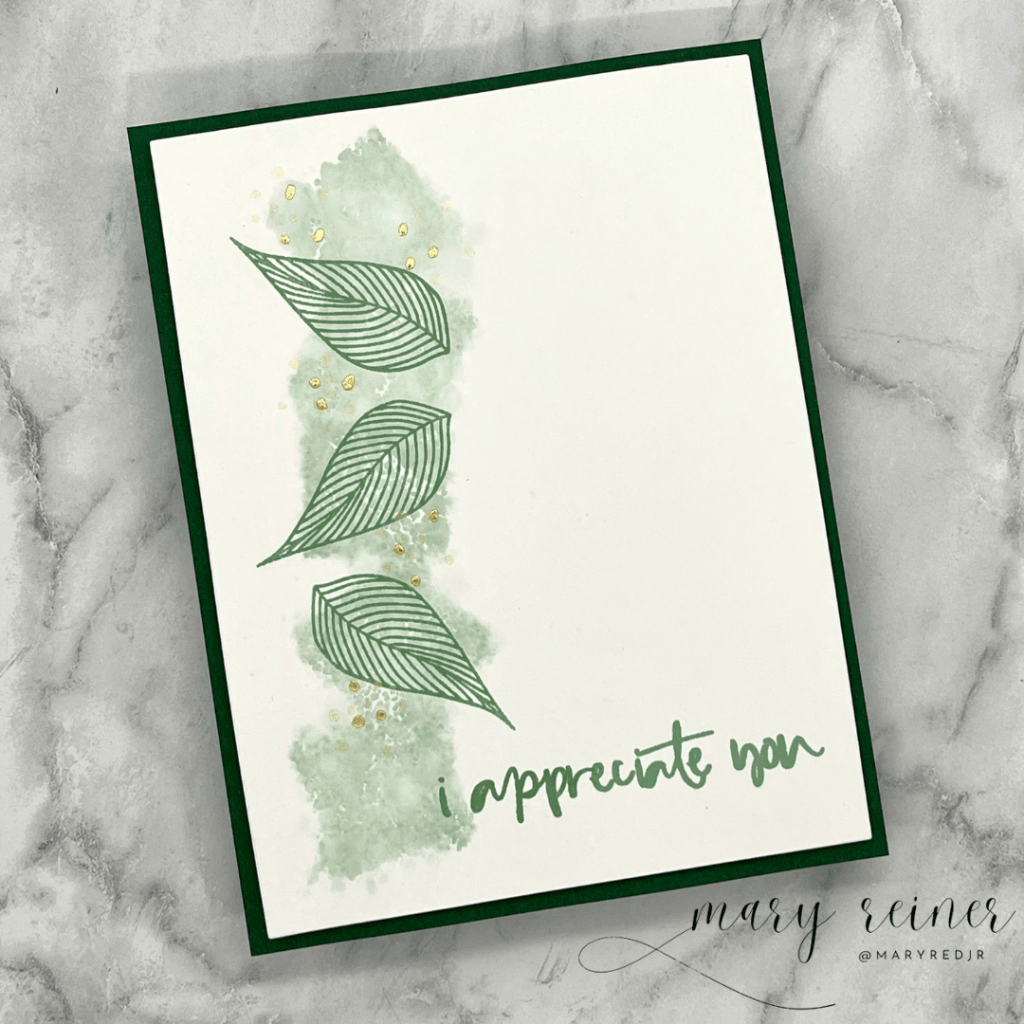
I played with the new Dreamy Leaves stamp set. I think this is a very versatile set! The images would be appropriate for almost any occasion, and the sentiments are so sweet too. I created two similiar cards.
It is time for another fun release from Simon Says Stamp!
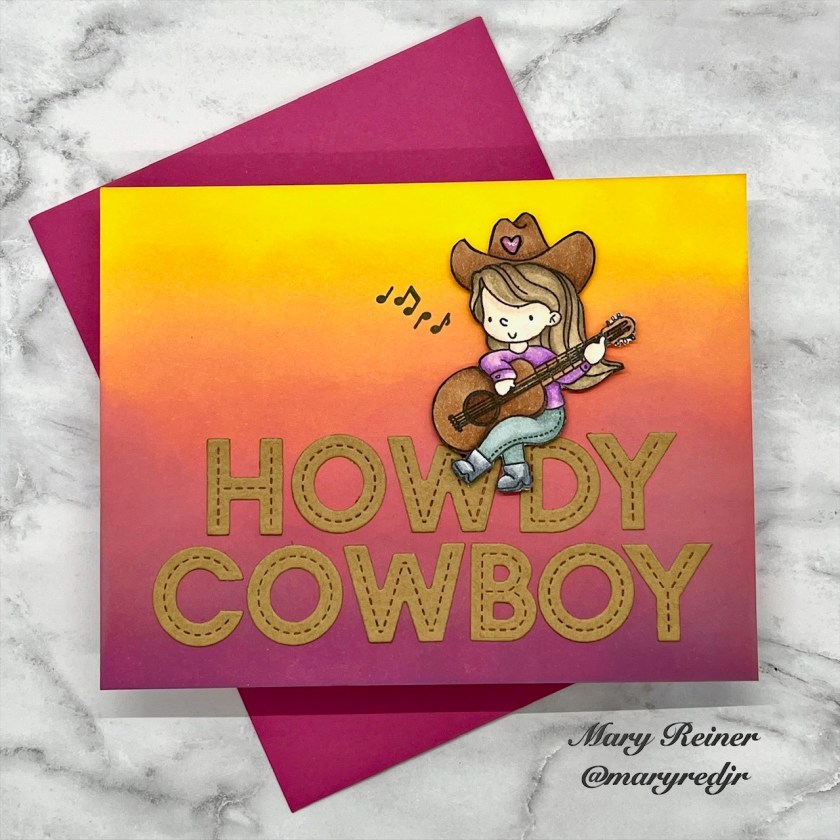
Today, I am sharing two cards I created using the new stamp set, “Howdy.” This cute set is full of lots of western icons, two adorable little cowgirls, and some fun sentiments.
To create the background, I ink blended the following Distress Oxides colors:
Fossilized Amber
Carved Pumpkin
Picked Raspberries
Seedless Preserves
I wanted the background to mimic a desert sunset.
I stamped the cowgirl in Momento Tuxedo Black ink and colored her with Copic markers. There are dies available for this stamp set, but I did not have them, so I fussy cut her.
Next, I die cut the letters from Lawn Fawn’s Olliver’s ABC’s and adhered them to the background.
Then, I added foam adhesive to the back of the cowgirl and adhered her to the card. To finish the card, I adhered it to an A2 card base.
To begin, I stamped the cowgirl in Momento Tuxedo Black Ink onto cardstock and also onto a piece of GinaK Masking Magic. I cut out the mask and covered up the cowgirl image. I did a little ink blending using Worn Lipstick and Tea Dye. I splattered white, acrylic paint to add texture to the ground.
I removed the mask, and used Copic markers to color the image and then die cut it with a circle die. I also die cut a scalloped circle and adhered the two together.
Next, I created the patterned background by stamping various images from the set in Concord and 9th Dove Ink.
I thought the card needed a bit more color, so I die cut a green banner and adhered it to the card and added the circles on top. Then I stamped the sentiment below.
Lastly, I adhered the whole panel to a grey A2 top folding card base.
I had so much fun creating with this darling set!
Below is a link to check out the whole release. I hope you will consider using my affiliate link.