Posted in Cardmaking

One Stamp Set, Three Ways

The Simon Says Stamp Cozy Hugs release is live! There are so many great products for your seasonal crafting.

I am featuring projects created with the Simon Says Stamp Batty for You stamp set. This stamp set has an adorable bat and several fun sentiments. I am so excited to share these projects with you!

Simon Says Stamps and Dies BATTY FOR YOU set568bf Cozy Hugs
from: Simon Says Stamp

Card #1

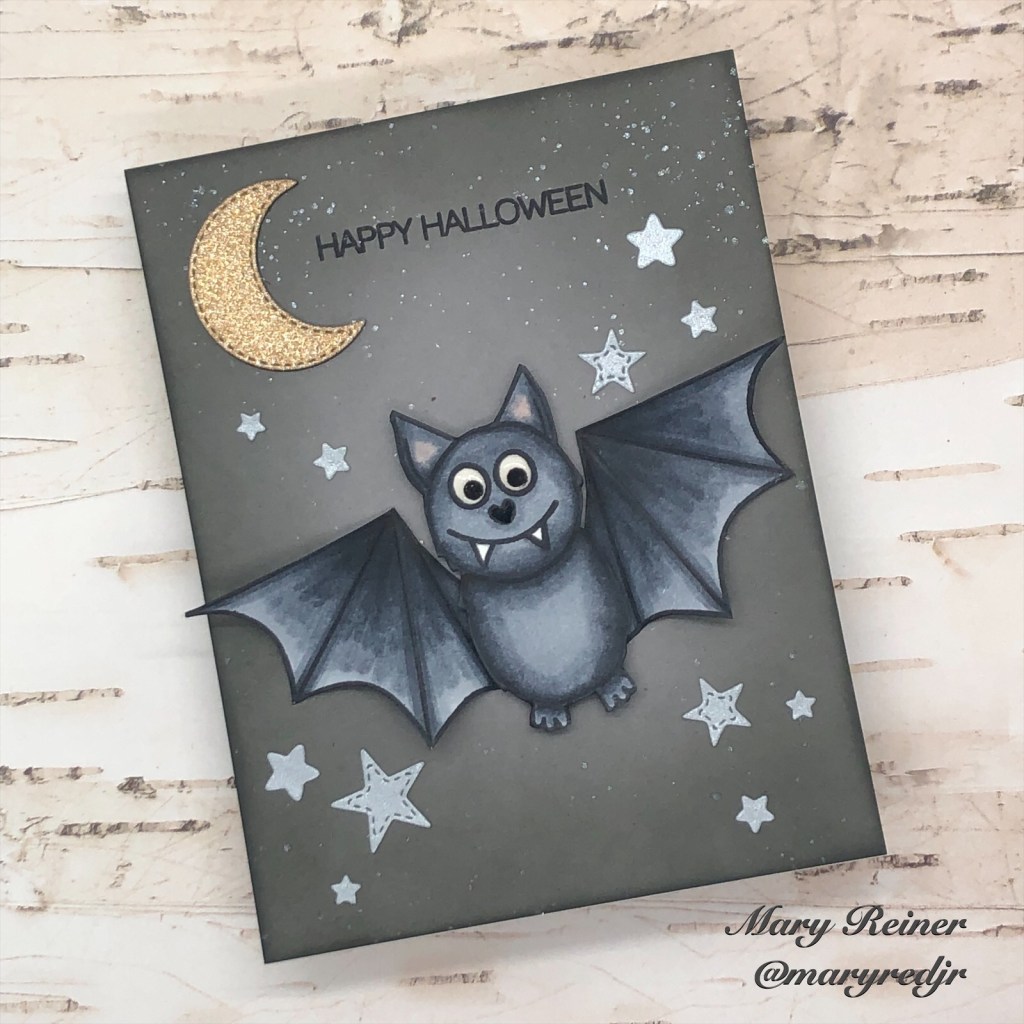
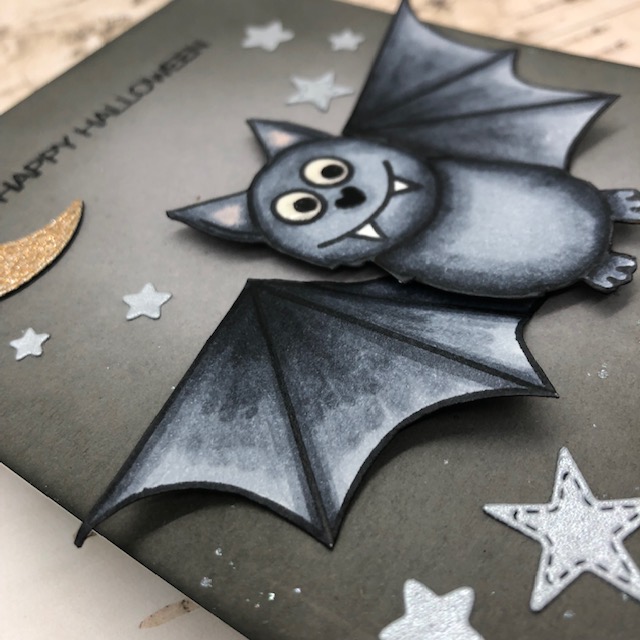
For my first project, I wanted to create a fun Halloween card. I began by stamping the bat parts out and then Copic Colored them. I used the following : 100, W8, W6, W5, W3 and R01. I did not have the dies, so I fussy cut my bat – It was super easy! I wanted to add some dimension, so I scored the wing along the printed lines, and gently folded them accordian style. I adhered the wings to the back of the bat body. I used a Sakura Black Glaze pen on his nose and Ranger Glossy Accents on the eyes to add some shine.

Next, I cut a 4.25 x 5.5 panel out of grey Kraft paper and ink blended around the edges with Ranger Black Soot Distress Oxide. I splattered Ranger Perfect Pearls to add some sparkle. I die cut stars and a moon out of metallic paper from my stash. I also cut a moon out of heavy black cardstock to layer behind the gold moon for dimension.

I played around with the layout of the card so I could determine where I wanted to stamp the sentiment. I stamped it, then adhered all of the elements to the background. Lastly, I adhered the whole panel to a top-folding A2 cardbase so it would be ready to mail.

I had so much fun creating the first card, I decided to make another one!

Card #2:

For my next project, I prepared the bat exactly as I did for the first project. I used the Simon Says Stamp Here for the Boos die for the sentiment. I die cut the words out of black cardstock, and the background out of purple cardstock. I left the whole purple die cut in tact, so I could layer the black wording on top of it. I love the added dimension this gives! I also adhered some foam tape behind the sentiment die cut and the bat so they would pop off the background.

Simon Says Stamp HERE FOR THE BOOS Wafer Dies sssd112218 – $8.99
from: Simon Says Stamp

For the background, I found some textured cardstock in my stash that I thought would look cool ink blended. I started with Speckled Egg Distress Oxide and then moved to Chipped Sapphire and finally, Villanous Potion. I went over these a few times to get the blend I wanted to acheive. Next, I die cut the panel with a Honey Bee Deckle Edge A2 die. I adhered it to a top folding, A2 panel and added my sentiment and bat die cuts. This card really came together quickly!

Project #3:

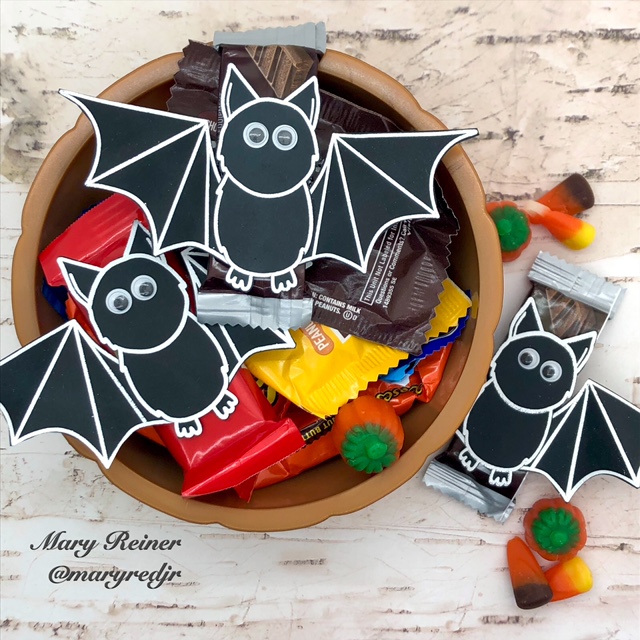
I love giving out a little something special to some of my favorite trick-or-treaters. So I decided to add the cute bat to some Halloween treats.

This time, all I did was stamp the bat parts with Versa Mark embossing ink and heat embossed with Brutus Monroe Alabaster embossing powder. (Glow in the dark embossing powder would be really fun for this too!)I fussy cut the bats again and folded the wings (I scored on the back of the wings so I wouldn’t mess up the embossing) for dimension. Then, I added googly eyes for some extra fun. Lastly, I adhered the bats to the candy with a pop dot. Don’t they look fun in the candy dish?!?

I hope this gave you some inspiration for creating your own Halloween creations with this new set from Simon Says Stamp.

For more card inspiration, please follow me on Instagram @maryredjr

Thanks for visiting!

Posted in Uncategorized

Indigo Sympathy Card

Today I am sharing a recent sympathy card I made. I was inspired by cards on the Pinkfresh Studios webpage and also the current Freshly Made Sketch Challenge #525. Here is the sketch:

And here is the card I created:

I used the following products to create my card:

~Pinkfresh Studio Indigo Vines Die and Washi Tape

~Pinkfresh Studio Mini Slimline Essentials Dies

~Unity Stamp Company May Hope Sustain You stamp set

~GinaK In the Navy Ink

~sequins and paper from from my stash

I really like all of the texture I created with the different layers of die cutting.

For me, sympathy cards are difficult to make. It was nice to have a sketch for inspiration. Do you have a go to design for sympathy cards? Let me know in the comments.

Thanks!

Mary

Posted in Uncategorized

National Tea Day

Happy National Tea Day! Are you a tea drinker? I mostly drink coffee, but I do enjoy a chai tea every once and a while.

This is the project I created in honor of National Tea Day:

For my card, I used the following products:

Sentiment: Honey Bee Hug in a Mug stamps and dies

Image: Honey Bee Mugs and Kisses dies

Patterned Paper: GinaK Blizzard paper and Lawn Fawn Hello Sunshine Remix/Oh Happy Day

Ink: GinaK Soft Stone and Ranger Distress Oxide in Peacock Feathers

This card is pretty straightforward – it was just a lot of die cutting and glueing!

Though I’m not a regular tea-drinker, I do enjoy chai flavored treats! Here’s a yummy, tea-inspired recipe, Chai Spice Monkey Bread from All Recipes. It’s soooo good!

https://www.allrecipes.com/recipe/259015/chai-spice-monkey-bread/

If you would like to shop for these adorable Honey Bee products, feel free to click the link below.

I hope you are having a tea-riffic day!

Mary

Posted in Uncategorized

It’s National Hot Cocoa Day

It’s not the holidays without cocoa! Here are my projects for National Hot Cocoa Day:

Here is my card and belly band recipe:

Sentiment: Honey Bee Stamps “Hug in a Mug” stamps and dies

Image: Honey Bee Stamps “Mugs & Kisses” die set, Hello Bluebird “Holly and Pine” dies

Background: Simon Says Stamp “Pine Bouquet” Embossing Folder

Ink: GinaK Dark Chocolate

Since it is National Hot Cocoa Day, I thought I’d also share a recipe for homemade hot cocoa mix. This recipe makes enough for 4 servings. Serve in a festive mug with marshmallows or a candy cane for a sweet seasonal treat.

Ingredients:

4 cups milk (whole or 2%)

1/4 cup unsweetened cocoa

1/4 cup granulated sugar

1/2 cup bittersweet or semi-sweet chocolate chips or chopped chocolate bar

1/4 teaspoon pure vanilla extract

Place milk, cocoa powder and sugar in a small saucepan. Heat over medium/medium low heat, whisking frequently, until warm (but not boiling). Add chocolate chips and whisk constantly until the chocolate chips melt and distribute evenly into the milk. Whisk in the vanilla extract and serve immediately.

Enjoy!

I hope you will join in the fun and link up your newly created hot cocoa project for a chance to be a guest designer on the Coffee Loving Cardmakers Blog. Details and link up can be found on the blog: http://coffeelovingcardmakers.com/18349

Now go treat yourself – you deserve it!

May your day be warm and cozy,

Mary

Posted in Uncategorized

Every Girl’s Crazy ‘Bout a Sharp Dressed Man

At a very young age, my son, Kyle, decided he really liked to wear a tux.

It all started when he was in my sister’s wedding at age 4. He loved the tux he wore. In fact, he asked me what job could he do where he could wear a tux.

I told him he could be a limo driver. He liked that idea.

As Kyle grew, his admiration for tuxes continued. And he found lots of reasons to wear one.

Above: Kyle playing piano at my wedding 2006. Below: Senior Prom 2011

Above: University of Cincinnati College Conservatory of Music Wind Symphony 2019. Can you spot Kyle?

Kyle’s love of tuxedos inspired this card.

The Suit Jacket die is part of Divinity Designs latest release. To create this card, I started by die cutting the card base from the Couture Collection Die Set. Next, I die cut the suit coat parts, as well as the bow tie and pocket square, with the Suit Jacket Dies. I liked the idea of a polka dot bow tie and pocket square. To make this even more “tux like,” I added a boutonnière. I used a pop dot to give the boutonnière some dimension. I created it by stamping the rose from the My World Stamp/Die Duos with red ink onto red cardstock. I die cut it out and added a green leaf cut from the Bitty Blossoms Die Set.

I love the detail I can achieve with this set of dies! Aren’t those buttons so cute?

I can’t wait to send this card to Kyle!

Posted in Uncategorized

A Rose for Mom

It’s time to start thinking about how we can honor the Mother’s in our lives. My mom loved roses and she would have loved the projects I made with this new stamp set from Divinity Designs.

I was fortunate to be a guest designer for Divinity Designs this month. I really fell in love with this new set – My World Stamp/Die Duo. It has the perfect sentiments for creating Mother’s Day projects.

Here are a couple of cards I created using this new stamp and die set.

I also thought it would be fun to create a Mother’s Day themed Timeless Tote.

I decided to use glitter paste and the new Rose Mixed Media Stencil on the front pocket to add some sparkle and texture.

This pocket is the perfect size to hold a gift card! Inside the tote I placed a small pack of tissues and a small hand sanitizer. We can’t have too much of that these days!

Happy Mother’s Day!