I thought I would celebrate by creating a hot cocoa card!
Have you ever had trouble with your embossing powder? I have read that after some time, some powders can go bad. Have you experienced this? I used my go-to white embossing powder, but I did not like how it embossed. It looked bubbly and didn’t melt well. I tried embossing again and had the same result. So I ended up re-stamping and embossing with a brand new powder. I liked the results much better! I think it’s time for me to get rid of that older powder
For my card, I used the following products:
~My Favorite Things Hug in a Mug stamp set for the sentiment
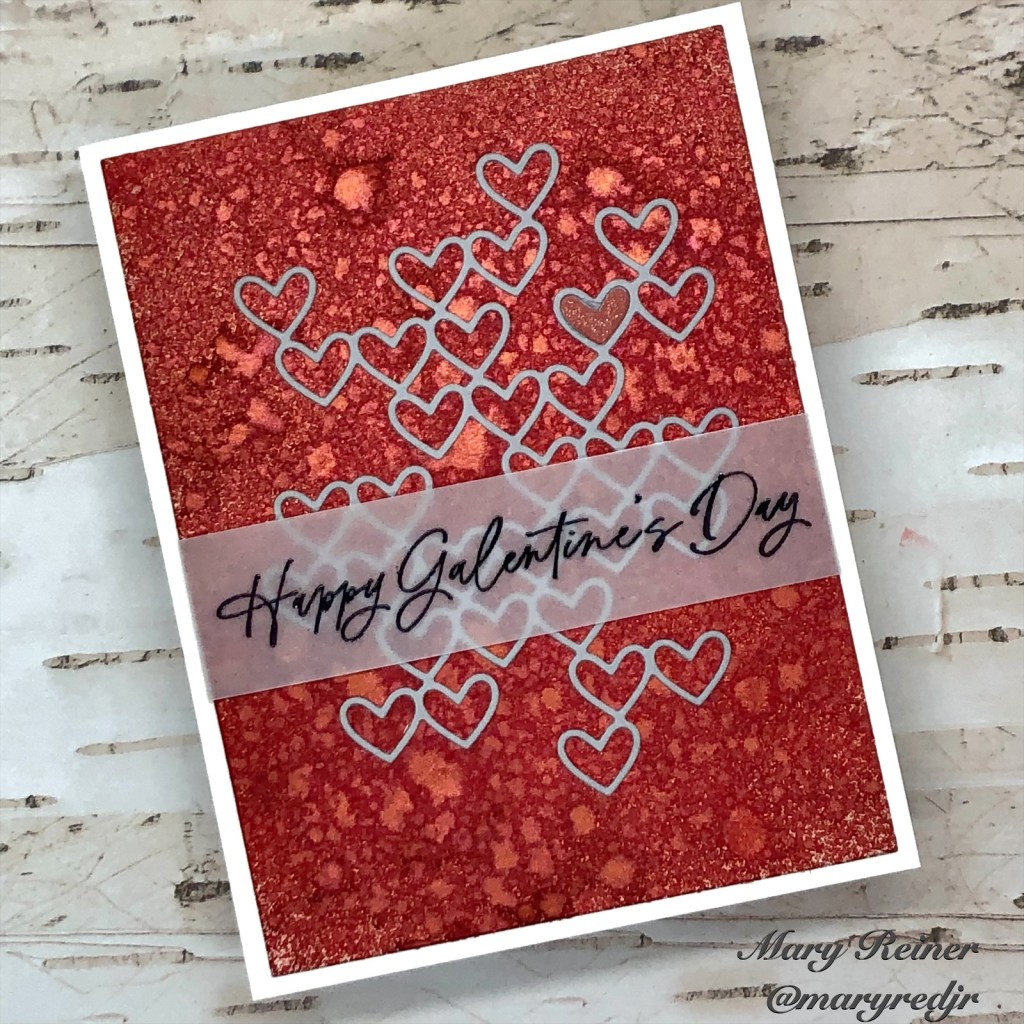
Hello and welcome back. The Hugs Release is now available from Simon Says Stamp and my cards today feature one of the new stamp sets, “You’re My Gal.” It is such a fun set, especially for making cards for your gal pals!
I wanted to make a quick Valentine and this set makes it super easy. To create this, I die cut a white panel with one of my stitched, rectangle nesting dies. Next, I stamped the sentiment from the You’re My Gal stamp set with Moment Tuxedo Black Ink. Then, I die cut a little envelope and a little heart. I adhered the envelope above the sentiment and then added the heart. Lastly, I adhered the white panel to an A2 top folding card base. Easy peasy!
To start my card, I stamped the little envelope image from the stamp set in GinaK Soft Stone Ink to create my own patterned paper. Next, I stamped “Hey Girl” in Picked Raspberry Distress Oxide. I set the ink by drying it with my heat tool. Then, I stamped it again (using my MISTI) in clear embossing ink. I sprinkled Picked Raspberry Distress Embossing Glaze over it and heat embossed it. I love that you can still see the background through the sentiment. Next, I stamped the smaller sentiment in Momento Tuxedo Black Ink. I decided to add a few small hearts. I made those by inking and embossing a piece of paper to match the sentiment. I die cut the heart and added them to the card. Lastly, I adhered the panel to an A2, side folded card base that I made from Fog cardstock from Simon Says Stamp.
This one is my favorite! To create the background, I misted a panel of Canson Watercolor paper with water and then sprayed it with Tart Cranberry Mica Stain. I set that panel aside to dry while I worked on the rest of the card elements. Next, I used the Simon Says Stamp Stacked Hearts die to cut out the grey heart pattern. I adhered it to the red panel and kept one of the little hearts in place. I added red Wink of Stella to that small heart to give it some sparkle. Then, I cut a 1″ x 5″ piece of vellum. I used my Rabbit Hole Cottontail Embossing Tool and then stamped the sentiment in embossing ink. I sprinkled Ranger Black Embossing Powder and heat embossed it. Next, I figured out where I wanted the sentiment and then folded the excess vellum around the back of the red panel and adhered it on the back. Lastly, I adhered the red panel to a white, A2 top-folding card base. I love how this card turned out!
I am very excited to be this weeks Growing In Unity gal. Today I am sharing a cute, holiday card.
This card features the It’s Christmas Oh Deer Itty Bitty stamp. Isn’t it so cute? I love the Itty Bitty stamps from Unity. They are such a great value and a fun, little gift to share with a crafty friend. Let me know what your favorite Itty Bitty stamp is…I’d love to add to my collection!
Be sure to leave a comment for a chance to win one of two $20 gift cards to the Unity online store. Please stop back tomorrow for another Unity project and another chance to win.
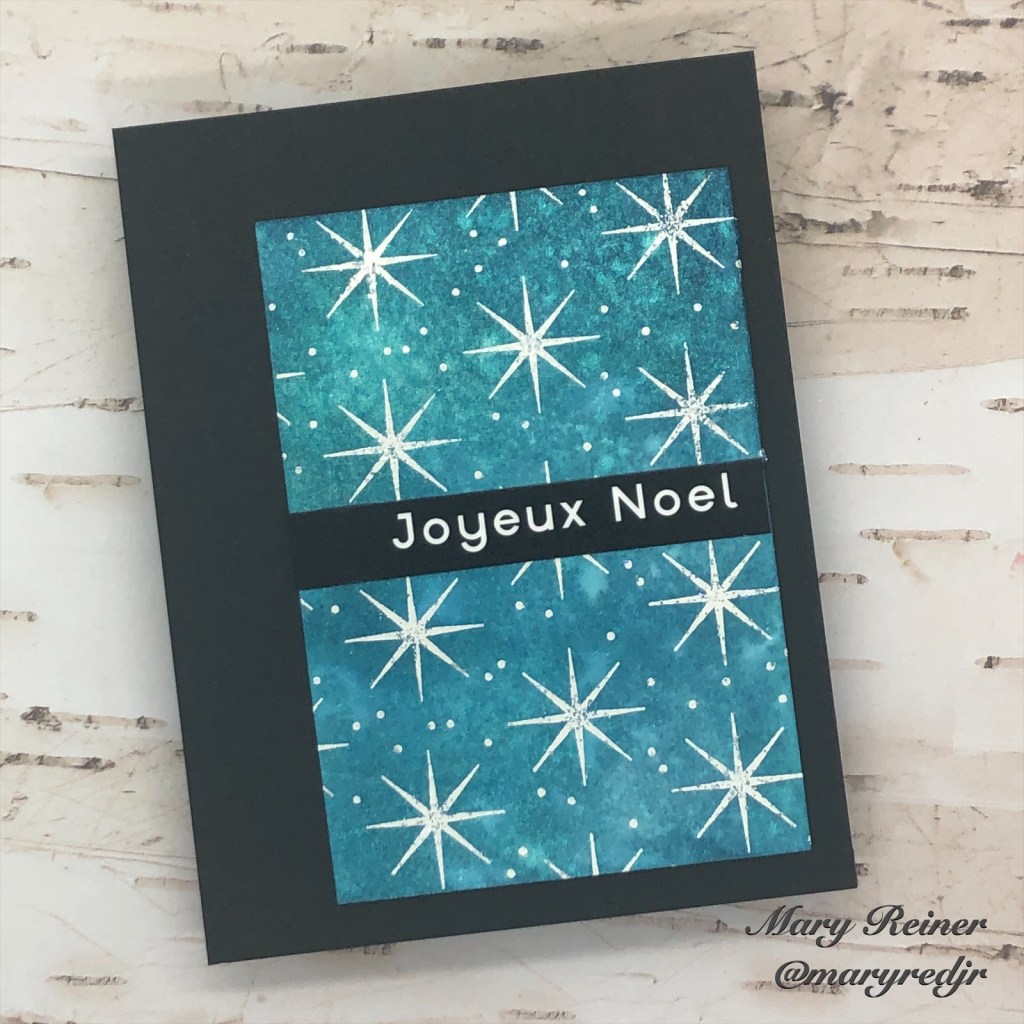
The latest Simon Says Stamp release, Holiday Sparkle, is live and you are going to LOVE it! Today I am featuring the new cling stamp “Christmas Star.”
This stamp is truly versatile and perfect for all of your holiday makes!
For my background, I sprayed Ranger’s Distress Mica Spray in Shiny Bauble and a bit of Merry Mint onto watercolor paper. I first misted the paper with water and then, layered on the mica spray. Let me tell you, that spray is magical! So shimmery and pretty! After it was completely dry, I inked up the cling stamp with embossing ink and then sprinkled on Ranger Snowflake Tinsel embossing powder. I decided I wanted lots of sparkle! After I embossed my background, I cut it down to 3″ x 4.5″. For my sentiment, I selected “Joyeux Noel” from Simon Says Stamp Reverse Christmas Wishes sentiment strips. Lastly, I adhered everything to a black panel and put it on a top folding A2 card base.
I loved the mica spray combined with this cling stamp so much, I had to make another card! I used the same process, but this time I only used the Merry Mint mica spray. Then, I heat embossed the stamp with Wow Metallic Platinum Sparkle embossing powder. Next, I cut the snow bank out of white card stock and stamped the sentiment in grey ink. I die cut the Simon Says Stylized Star from some matte silver card stock and adhered it to the background along with the snow bank. To finish, I adhered it to a top folding A2 card base.
I also made a quick and simple tag using the “Christmas Star” stamp set. Doesn’t the gold embossing look pretty on this dark green card stock? Stamping and embossing a 6 x6″ piece of cardstock allowed me to make multiple tags quickly. I die cut a small circle and scored it in the middle to create the topper to my tag. Once again, I used a sentiment from Simon’s Reverse Christmas Wishes sentiment strips.
I was challenged to create something other than a card with this cling stamp. So, I stamped it onto green paper with GinaK Fresh Asparagas ink and used my gold gel pen on the dots. This made adorable gift wrapping – especially with the gold bow!
I hope you are inspired to create some holiday crafts with big sparkle energy! Click here to see the entire new Holiday Sparkle Release https://bit.ly/3taLidE