It’s blog hop day two for Simon Says Stamp’s latest release, Beautiful Moments. I hope you will hop along to see all of the amazing inspiration. Comment on each stop for a chance to win a $25 gift card to Simon Says stamp.
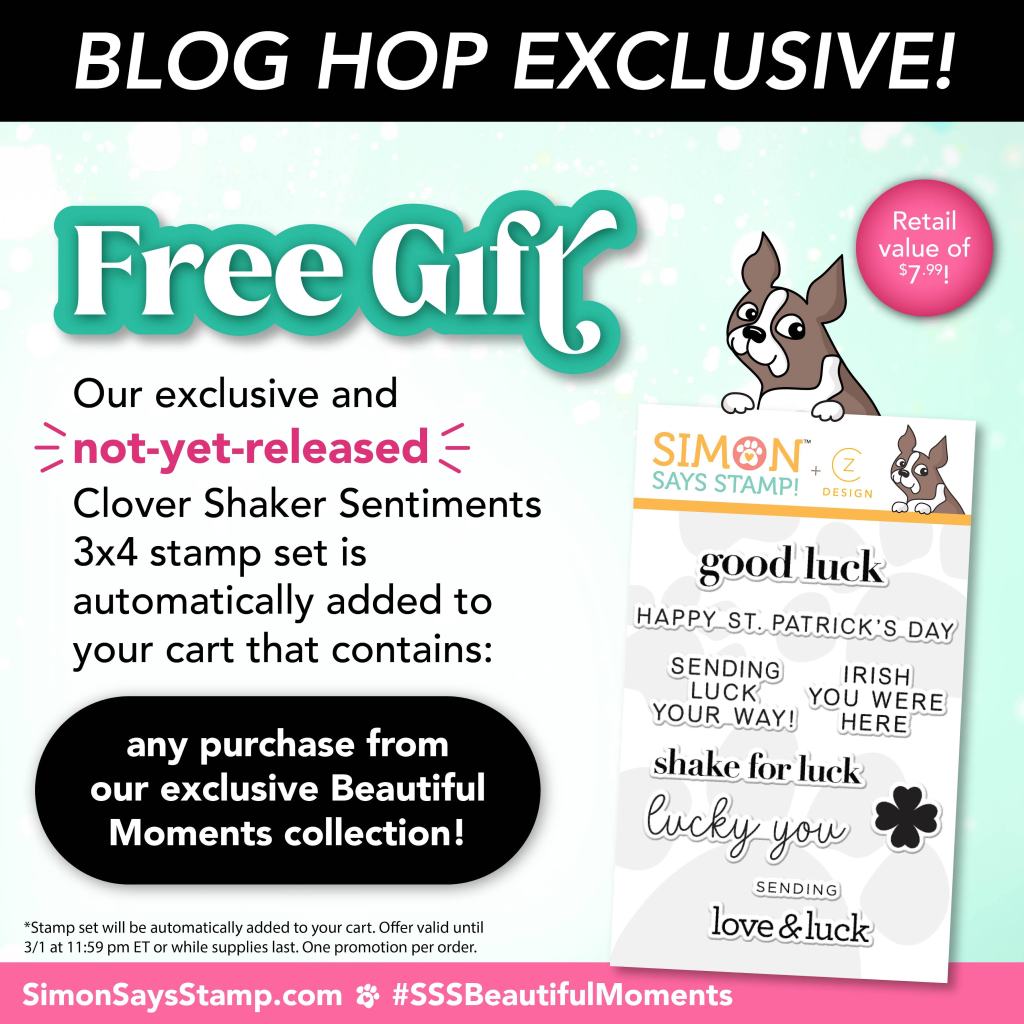
And, if you shop from the new release, this exclusive, not yet released, adorable stamp set will be added to your cart! This will be available until March 1 @ 11:59 p.m. EST or while supplies last.
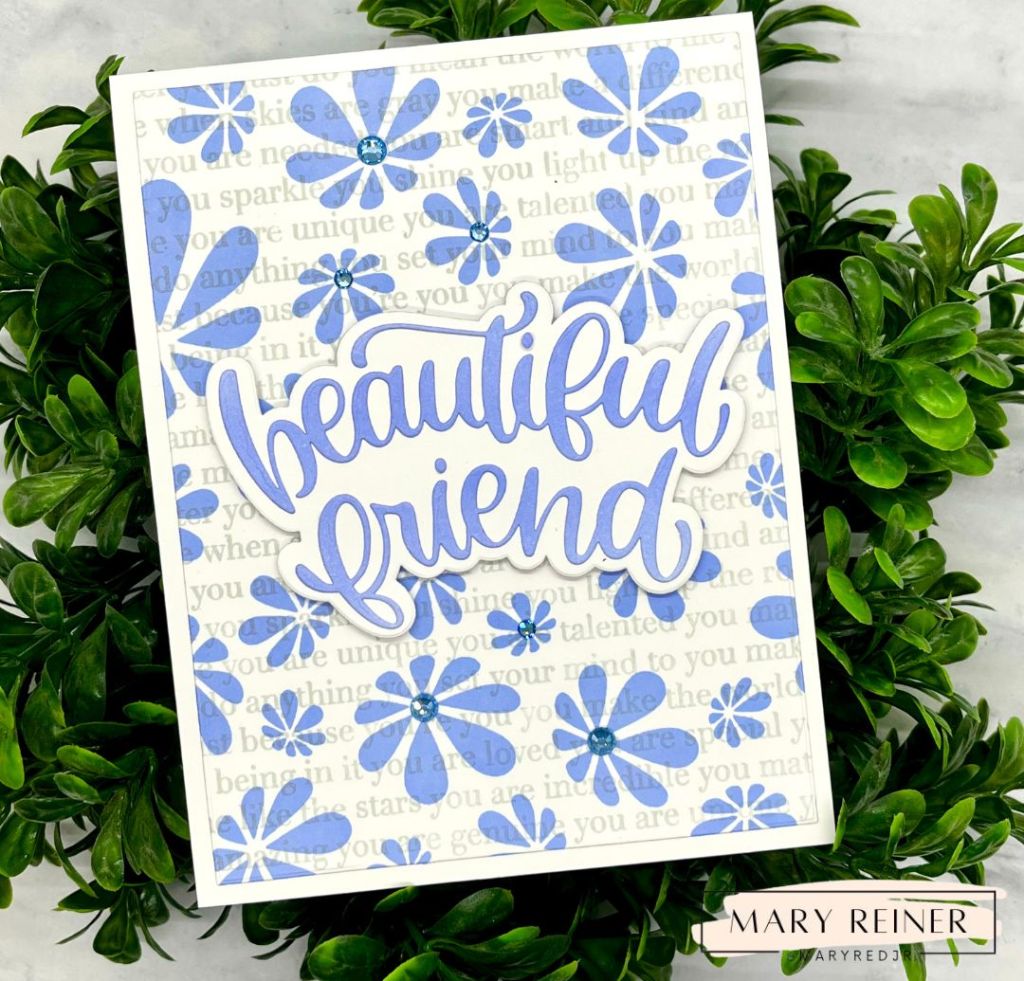
Today, I am sharing a card I created for a special friend and co-worker. She is beautiful inside and out! I love this gorgeous Periwinkle ink color! It is so pretty.
I used the following products to create this card:
~NEW~ Beautiful Friend die set
~NEW~ Groovy Daisies stamp set
~You Matter Background stamp
~A2 Rectangles
~Periwinkle and Flannel Pawsitively Saturated ink
~Dusky Pawsitively Saturated Gems
Here are the steps I used to create this card:
- Cut a white card stock panel to 4 x 5 1/4″
- Stamp the Groovy Daisies Stamp using Periwinkle ink.
- Over top of the daisies, stamp the You Matter Background Stamp using Flannel ink.
- Ink blend with Periwinkle a 4 X 4″ piece of card stock.
- Die cut the words from the Beautiful Friend die, out of the ink blended piece.
- Die cut the shadow from the Beautiful Friend die set from white card stock.
- Adhere the Beautiful Friend words to the shadow piece using liquid adhesive.
- Center and adhere the Daisy panel to a top folding, A2 card base.
- Adhere the sentiment, adding foam tape to the back for dimension.
- Lastly, add some gems to some of the the daisy centers.
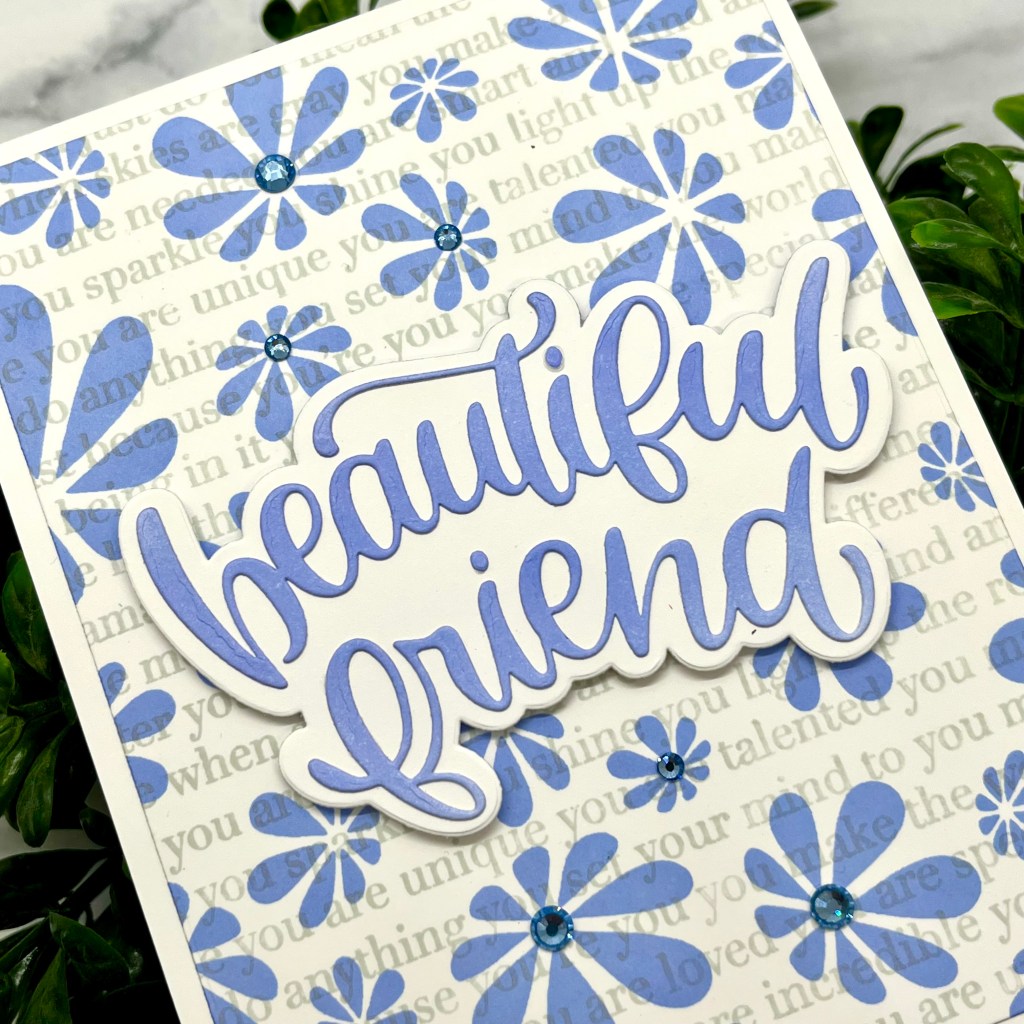
I am smitten with this newly released Beautiful Friends die set. I love the pretty font and the size makes it a perfect focal point for any card project. And the Groovy Daisies made a gorgeous background.
Check out the whole release here:
https://www.simonsaysstamp.com/collections/beautiful-moments
Next on the hop is: Nicki Baxley You will love what she has created!!
And be sure to look at yesterday’s hop for more inspiration.
Thanks for stopping by! Don’t forget to comment for a chance to win and I woould love it if you followed me on Instagram @mayredjr